How to Integrate EquiiTEXT Cloud Web App & Mobile App
Claudia Perez
A few points before starting
The “Cloud Web App” is Equiitext’s on-line platform accessed via https://cloud.equiitext.com. The “Mobile App” is the Equiitext app for Android which can be installed from the Google Play Store on Android devices.
Register using a Business Account. The email address and password for this account are used to login to https://cloud.equiitext.com. A mobile phone number can only be linked to one account at a time.
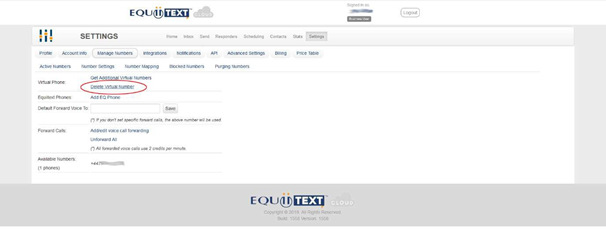
Then click “Delete Virtual Number”. Select the number to be deleted from the drop-down and confirm by clicking “Delete”.
Fig 2 – Choose number to delete and confirm
Contact phone numbers, that is the numbers which the user’s messages will be sent to, need to be in international format for UK numbers.
Getting Started – Installation
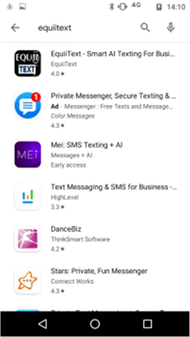
Search the Google Play Store for “Equiitext”
Equiitext app on Google Play Store
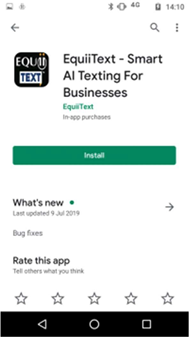
Select the “EquiiText – Smart AI Texting For Business” app and tap Install
Install the Equiitext app
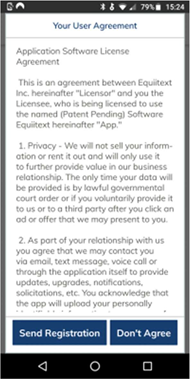
Once installed, register the phone with Equiitext by tapping “Send Registration”.
Send Registration to Equiitext popup
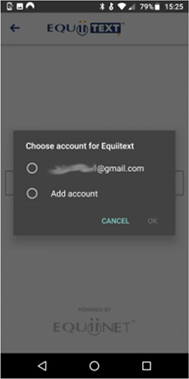
The app will then request an email account to use. Select the desired account and tap OK.
Choose the email account popup
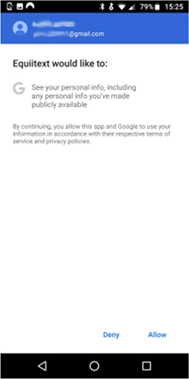
Permission will then be requested for access to personal information including any personal information made publicly available.
Allow personal information access
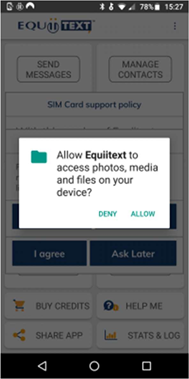
Once the account has been verified, the app will request access to photos, media and files. Allow access.
Allow photos, media and files access popup
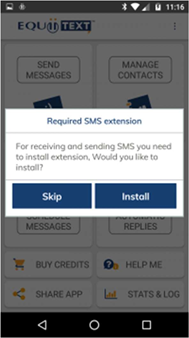
The app will then prompt to install an SMS extension for sending and receiving messages.
Install the required SMS extension popup
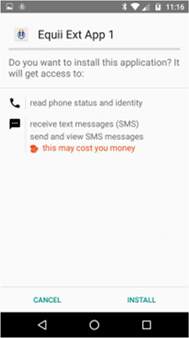
Selecting Install will then request the user to allow access to the phone status, phone identity and send, view and receive SMS messages. A warning that costs may be incurred is also presented. Tap Install to continue.
Allow phone status, identity, send, receive and view SMS access
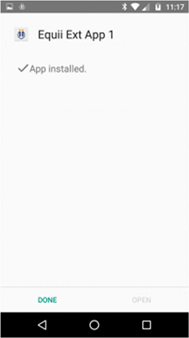
Once the extension has been installed, a confirmation message is displayed. Tap Done to continue.
Confirmation of app installed
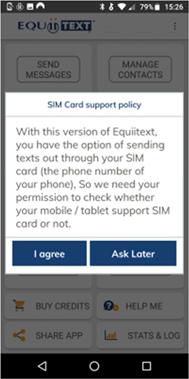
To send texts from the Equiitext app using the phone’s SIM card, agree to the request to check whether the phone/tablet can send them.
Check SIM card support popup
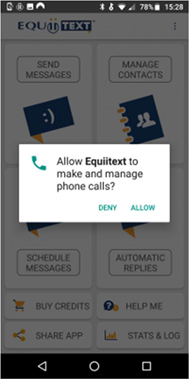
The app will then request access to make or manage calls. Allow access.
Allow make and manage calls access popup
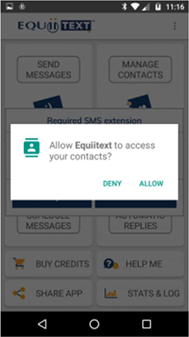
During the installation process, the app may request access to the phone’s contacts. Allow or deny permission.
Allow contacts access popup
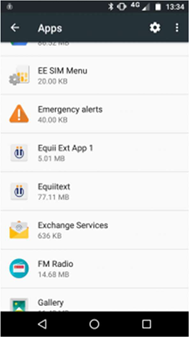
Once installation has completed, there will be two Equiitext apps listed in the phone’s Settings as below.
Installed apps
Once started the app continues running until shutdown
Connecting to the Cloud Web App
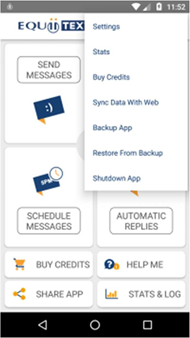
To log into the Cloud Web app go to Settings on the phone app.
Phone app Settings menu link
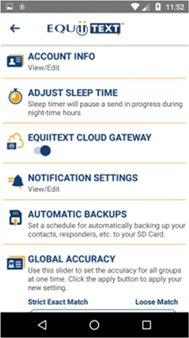
Tap the toggle button underneath “Equiitext Cloud Gateway” so the toggle is to the right.
Equiitext Cloud Gateway option
This will trigger the “Equiitext Cloud Login” popup.
Equiitext Cloud Login popup
Enter the username and password for the Cloud Web Account and also, the mobile phone number of the phone the app is installed on. Then tap Login.
The login details can be found under Settings -> Account Info -> Contact Info. Settings are accessed via the menu on the top right of the Equiitext App.
If successful, the mobile number registration with the Cloud Web App is confirmed via a message on the phone. Otherwise, an error message will be displayed.
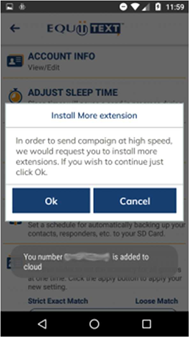
Install additional extensions popup
To increase the speed at which messages are sent, the app will then prompt to install additional Extensions. Add as many Extensions as desired, up to a maximum of 20.
Add/remove extensions
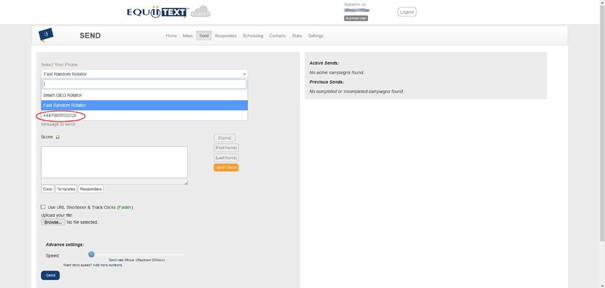
Click on “Send Messages” on the main menu of the Cloud Web App. The mobile phone number that has just been added should be displayed in the “Select Your Phone” dropdown.
Added mobile number displayed under “Select Your Phone”
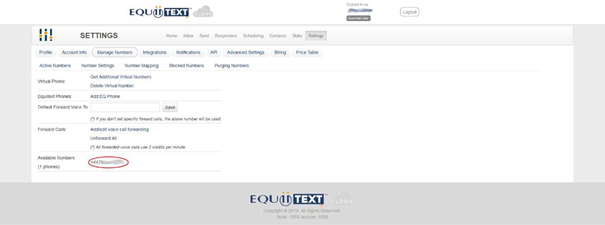
The added phone number should also be displayed in “Available Numbers”. This can be accessed via “Settings” on the main menu of the Cloud Web App. Then click on “Manage Numbers” to view “Available Numbers”.
Added mobile number displayed under “Available Numbers”
Sending a Campaign
Once the phone number has registered on the Cloud Web App, it can then be used to send campaigns.
Click on “Send Messages” on the main menu of the Cloud Web App.
From the “Select Your Phone” dropdown, select the newly added mobile phone number.
Then select from the “Group/phone” drop down the group required or input a single mobile number to send to. Note: A contact group is considered a campaign, a single number is not.
Enter the message to be sent and set the “Speed” under “Advanced Settings” to be greater than zero. This sets the number of messages to be sent per hour. Note: if this is set to 4 per hour, for example, then a message will be sent every 15 mins.
Send Messages screen with message to send, Phone and Group selected
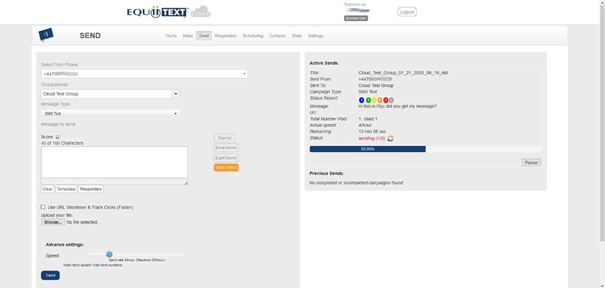
Clicking “Send” will send the message and the campaign will display in the “Active Sends” on the right-hand side of the screen. This will display the number of messages already sent along with the rate of sending amongst other campaign related information as displayed below.
Send Messages screen showing Campaign information
In the phone app, the messages will appear in the Inbox. To view the Inbox tap on the “Send Messages” icon on the main menu screen.
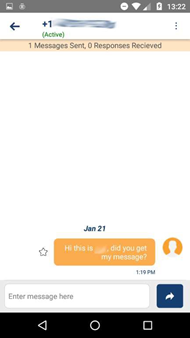
Tapping on the relevant message will then display as below (Fig 25).
Initial Campaign message in Equiitext Phone app Inbox
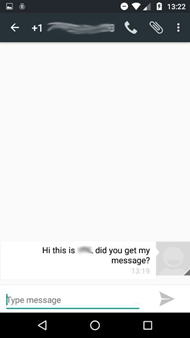
The message will also be visible in the Android Messaging app as below.
Initial Campaign message in Android Messaging app
If “Auto Responders” are active, then the system will begin to respond when the recipient replies to the message.
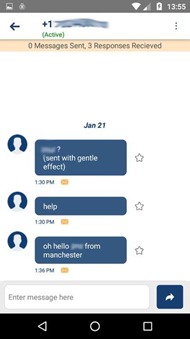
Viewing the message thread in the app will show the recipient’s replies.
Recipients replies to initial campaign message
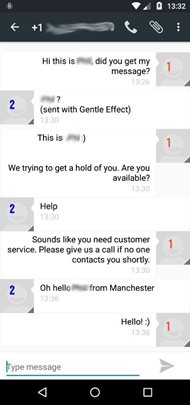
The Android Messaging app will display the full message thread/chat.
Messages displayed with “1” in the image below are sent from the Equiitext Cloud app with messages displayed with “2” being the recipient’s reply.
Start Texting with a Free Trial of Equiitext
Discover how Equiitext will enable your business to have engaging conversations with you customers with our patented AI messaging platform! Create your Business Messaging Account.